前回の記事にて、PWAという技術の概要やメリット、導入方法について触れました。
今回はその続きとしてService Workerの導入方法を解説します。
Service Workerのライフサイクル
Service Workerにはライフサイクルという概念があります。

最初のイベントはInstallingで、これが正常に完了するとService Workerはfetchやpushなどのイベントをバックグラウンドで行えるようになります。
1. Service Workerインストール
では実際のコードを見ていきます。
Service Workerの実体はJavaScriptコードです。
まず、htmlのbodyタグ最上部に以下のコードを差し込みます。
- index.html
<body>
    <script type="text/javascript">
       if ('serviceWorker' in navigator) {
           navigator.serviceWorker
               .register('sw.js')
               .then(function () { console.log("Service Worker Registered"); })
               .catch(function () { console.log("Service Worker Not Registered"); });
       }
   </script>
~~
</body>
上記のコードでは if ('serviceWorker' in navigator)でブラウザの検証を行い、Service Workerに対応していればインストール(register)を行っています。
その際外部スクリプトsw.jsを読み込み、これにService Workerとしての具体的な挙動を記述していきます。
以下のような2パターンについて解説します。
- 単一のページをキャッシュさせる
- 任意のコンテンツをオフラインキャッシュさせる
さらに本記事に記載するコードはPWA Builderというサービスで生成できるコードを参考にしています。
2. JavaScript
単一のページをキャッシュさせる
これは、PWA Builderにおける「Offline Page」というケースに当たります。
ユーザがオフライン時に表示するコンテンツを指定し、保存(キャッシュ)させます。
オフライン時に返却するコンテンツはoffline.htmlとします。
これをsw.jsという名前でトップ階層に配置します。
.
├── 404.html
├── css
├── fonts
├── images
├── index.html ★追記
├── js
├── manifest.json
├── offline.html ★追加
├── sass
└── sw.js # ★追加
- sw.js
// This is the "Offline page" service worker

const CACHE = "page-cache";

// TODO: replace the following with the correct offline fallback page i.e.: const offlineFallbackPage = "offline.html";
const offlineFallbackPage = "offline.html";

// Install stage sets up the offline page in the cache and opens a new cache
self.addEventListener("install", function (event) {
    console.log("Install Event processing");

    event.waitUntil(
        caches.open(CACHE).then(function (cache) {
            console.log("Cached offline page during install");
            return cache.add(offlineFallbackPage);
        })
    );
});

// If any fetch fails, it will show the offline page.
self.addEventListener("fetch", function (event) {
    if (event.request.method !== "GET") return;

    event.respondWith(
        fetch(event.request).catch(function (error) {
            // The following validates that the request was for a navigation to a new document
            if (
                event.request.destination !== "document" ||
                event.request.mode !== "navigate"
            ) {
                return;
            }

            console.error("Network request Failed. Serving offline page " + error);
            return caches.open(CACHE).then(function (cache) {
                return cache.match(offlineFallbackPage);
            });
        })
    );
});

// This is an event that can be fired from your page to tell the SW to update the offline page
self.addEventListener("refreshOffline", function () {
    const offlinePageRequest = new Request(offlineFallbackPage);

    return fetch(offlineFallbackPage).then(function (response) {
        return caches.open(CACHE).then(function (cache) {
            console.log("Offline page updated from refreshOffline event: " + response.url);
            return cache.put(offlinePageRequest, response);
        });
    });
});
offline.htmlには、サービスワーカーの登録を行うコードは差し込まなくても問題ありません(ユーザが直接アクセスするコンテンツではないため)。
動作確認
これをブラウザにインストールし、オフラインに切り替えてアクセスしてみましょう。
まず、ブラウザでサイトにアクセスします。
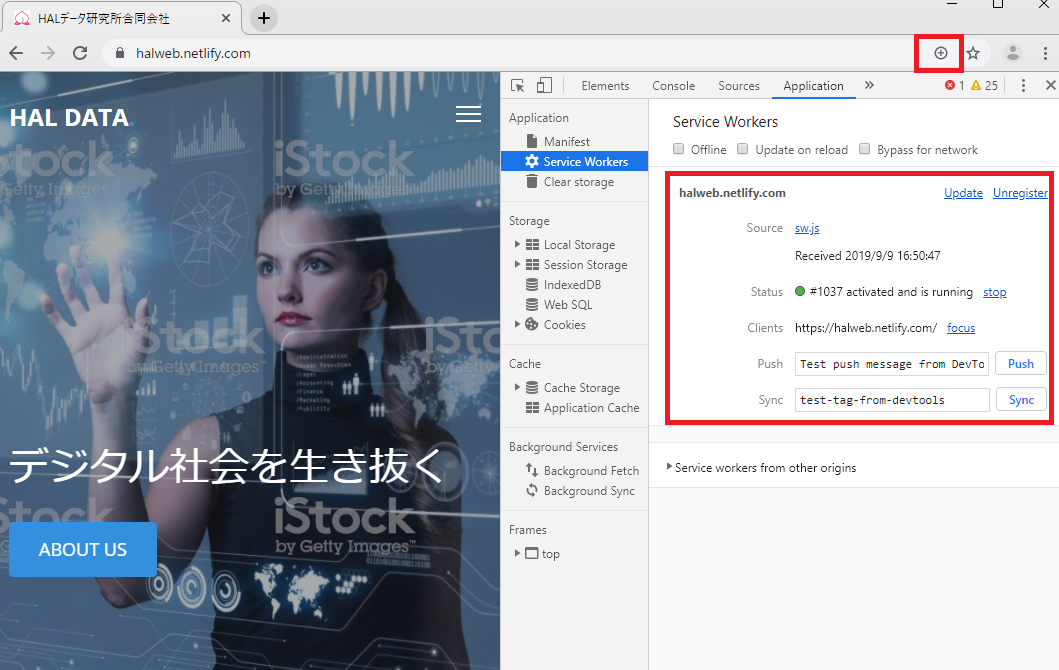
この際、アドレスバー右端に「+」マークが表示されて
デベロッパーツールの[Applicationタブ]>[Service Workers]でstatusがrunningとなっているはずです。
これで、Service Workerの最初のインストールが完了しています。
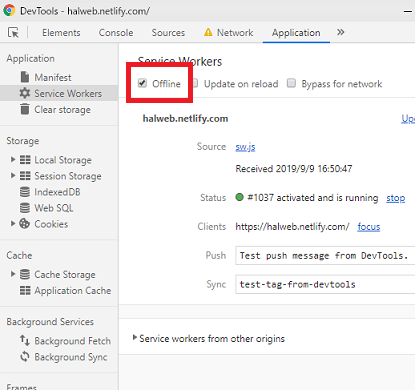
続いて、オフラインキャッシュを確認するために「Offline」にチェックを入れてページを更新してください。
この際、スーパーリロード(Windows ならCtrl + F5)してしまうとキャッシュがクリアされてしまうので注意してください。
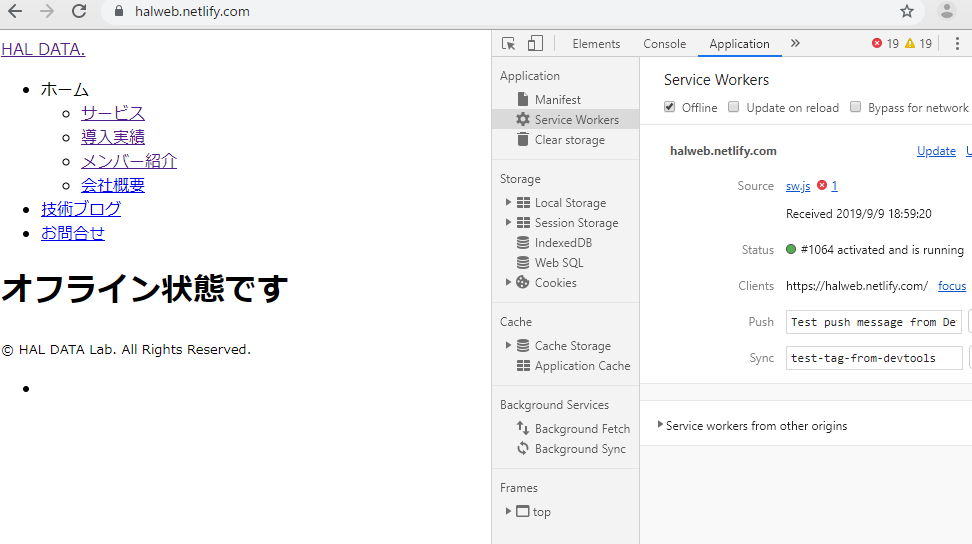
追加したoffline.htmlのコンテンツが表示されました。
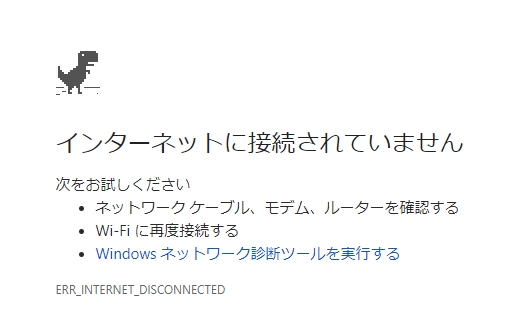
通常、オフライン状態なら以下のような画面が表示されるはずですので、きちんとコンテンツをキャッシュしていることが確認できました。
この例ではoffline.htmlを表示させた際に見栄えが崩れてしまっています。
これは、キャッシュさせたのはhtmlファイルのみでCSSやJavaScriptは一切キャッシュされていないためです。
任意のコンテンツをオフラインキャッシュさせるコード
続いて、複数のコンテンツをキャッシュさせる方法を解説します。
sw.jsは以下のようになります。
これはPWA BuilderにおけるCache-first networkに該当します。
precacheFilesでキャッシュするファイルをリスト指定し
cache.addAll(precacheFiles);によってクライアントがキャッシュを行うようにしています。
- sw.js
// This is the service worker with the Cache-first network

const CACHE = "precache";
const precacheFiles = [
  'index.html',
  '404.html',
  'offline.html',
  'hello.html',
  'css/animate.css',
  'css/icomoon.css',
  'css/bootstrap.css',
  'css/magnific-popup.css',
  'css/style-4.css',
  'https://use.fontawesome.com/releases/v5.5.0/css/all.css',
  'css/color-preset-option.css',
  'js/modernizr-2.6.2.min.js',
  'js/jquery.min.js',
  'js/jquery.easing.1.3.js',
  'js/bootstrap.min.js',
  'js/jquery.waypoints.min.js',
  'js/jquery.magnific-popup.min.js',
  'js/magnific-popup-options.js',
  'js/jquery.stellar.min.js',
  'js/main.js',
  'images/icons/favicon.ico',
  'images/icons/512.png',
  'images/top.jpg',
  'images/top-mobile.jpg'
];

self.addEventListener("install", function (event) {
  console.log("Install Event processing");

  console.log("Skip waiting on install");
  self.skipWaiting();

  event.waitUntil(
    caches.open(CACHE).then(function (cache) {
      console.log("Caching pages during install");
      return cache.addAll(precacheFiles);
    })
  );
});

// Allow sw to control of current page
self.addEventListener("activate", function (event) {
  console.log("Claiming clients for current page");
  event.waitUntil(self.clients.claim());
});

// If any fetch fails, it will look for the request in the cache and serve it from there first
self.addEventListener("fetch", function (event) {
  if (event.request.method !== "GET") return;

  event.respondWith(
    fromCache(event.request).then(
      function (response) {
        // The response was found in the cache so we responde with it and update the entry

        // This is where we call the server to get the newest version of the
        // file to use the next time we show view
        event.waitUntil(
          fetch(event.request).then(function (response) {
            return updateCache(event.request, response);
          })
        );

        return response;
      },
      function () {
        // The response was not found in the cache so we look for it on the server
        return fetch(event.request)
          .then(function (response) {
            // If request was success, add or update it in the cache
            event.waitUntil(updateCache(event.request, response.clone()));

            return response;
          })
          .catch(function (error) {
            console.log("Network request failed and no cache." + error);
          });
      }
    )
  );
});

function fromCache(request) {
  // Check to see if you have it in the cache
  // Return response
  // If not in the cache, then return
  return caches.open(CACHE).then(function (cache) {
    return cache.match(request).then(function (matching) {
      if (!matching || matching.status === 404) {
        return Promise.reject("no-match");
      }

      return matching;
    });
  });
}

function updateCache(request, response) {
  return caches.open(CACHE).then(function (cache) {
    return cache.put(request, response);
  });
}
.
├── 404.html
├── css
├── fonts
├── hello.html ★追加
├── images
├── index.html ★変更
├── js
├── manifest.json
├── offline.html
├── sass
└── sw.js # ★変更
動作確認
コンテンツがキャッシュされたことを確認するためにindex.htmlからhello.htmlへのリンクを作り、オフライン状態でアクセスしてみます。
Offline にチェックを入れてページを更新すると・・・
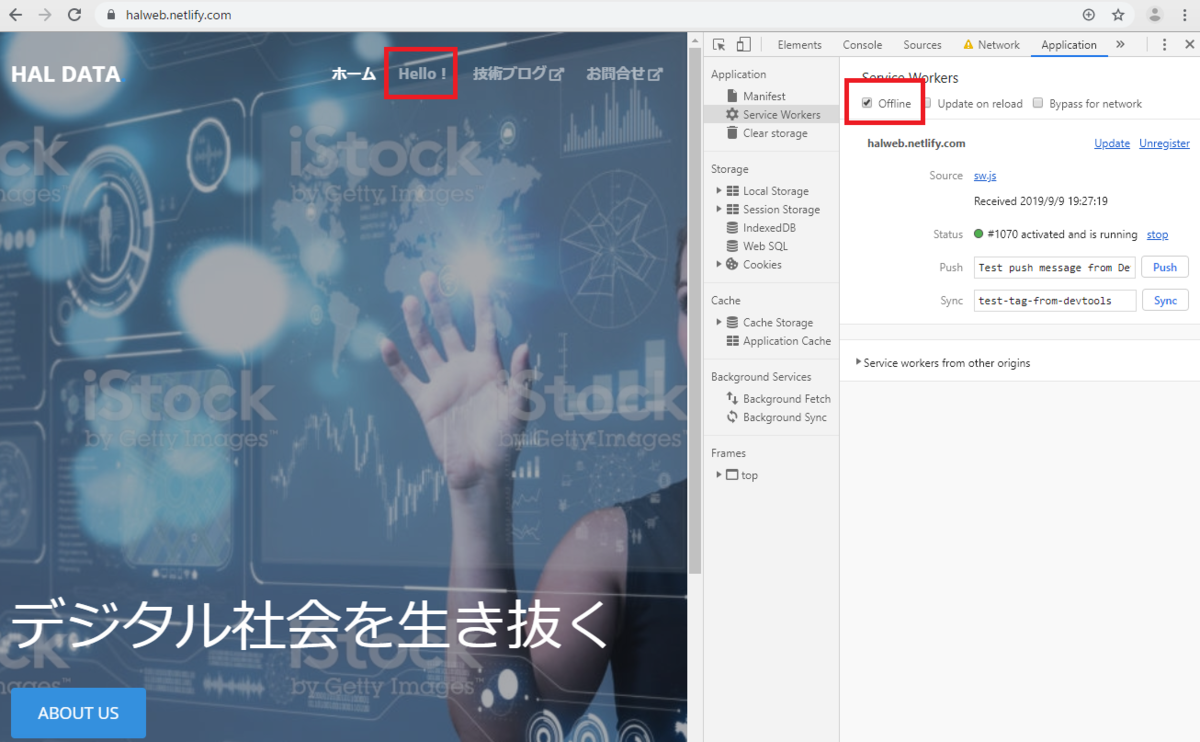
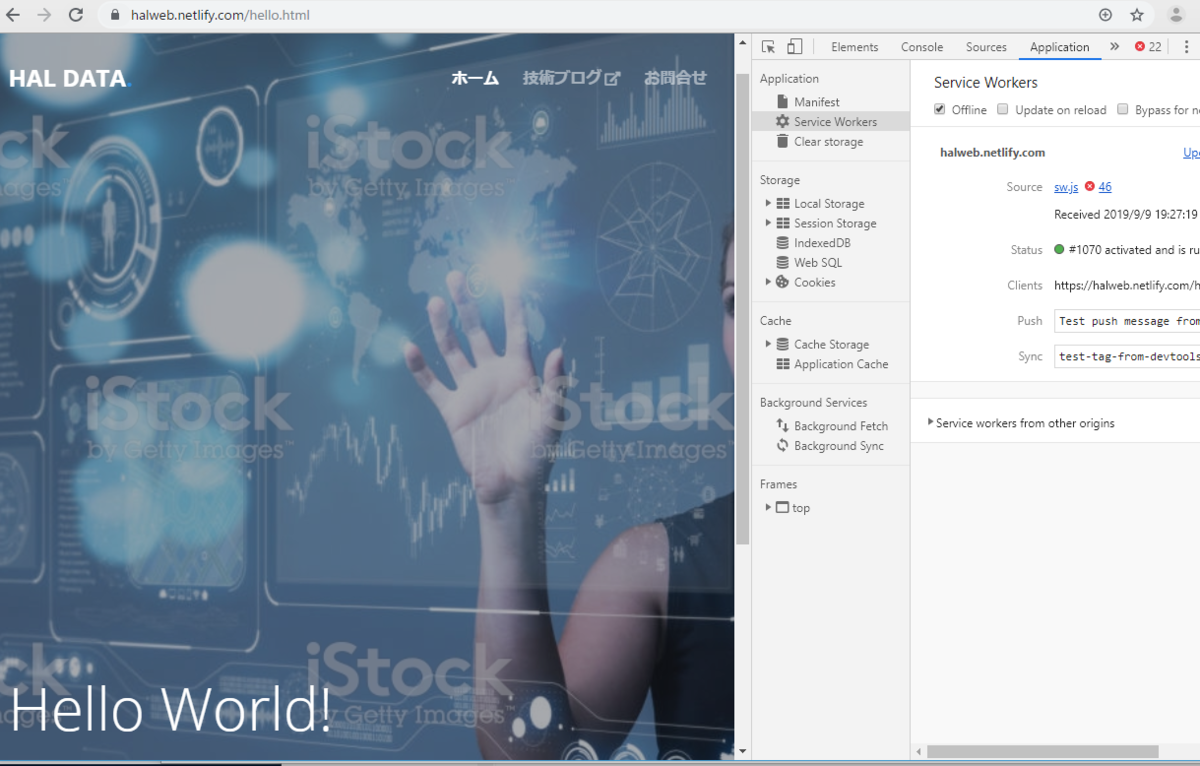
オフライン状態で見栄えを保ったままページの切り替えができました!!
※2枚目の画像でエラーのようなものが出ているのはオフライン状態のためです。
まとめ
PWAの実装方法について2回に分けて解説しました。
特に肝になるのはService Workerで、これを活用することでユーザ体験を高めることができます。
特に最初のページ表示は3秒以内にしないとユーザ離脱率がグンと上がってしまうと言われています。
ユーザに良いコンテンツを届けるための選択肢の助けになればと思います。
以上。